The VirtualBox appliance’s disk is too small
Table Of Contents
Introduction
Vagrant and VirtualBox are very useful for testing provisioning systems like Ansible, Chef, Puppet. Sometimes the appliance disk space is not enough.
Here is a way to resize it.
Environment Setup
The following tutorial is based on the usage of Vagrant and ubuntu 16.05 Xenial appliance on Mac OSX, but the procedure is still valid for those using only VirtualBox.
Install Virtual Box
Download installer from VirtualBox site
Install Vagrant
Download 64bit version from Vagrant site
Download Appliance
run this command inside a terminal:
vagrant box add ubuntu/xenial64
Expand HDD Box image
Launch Virtual Box App
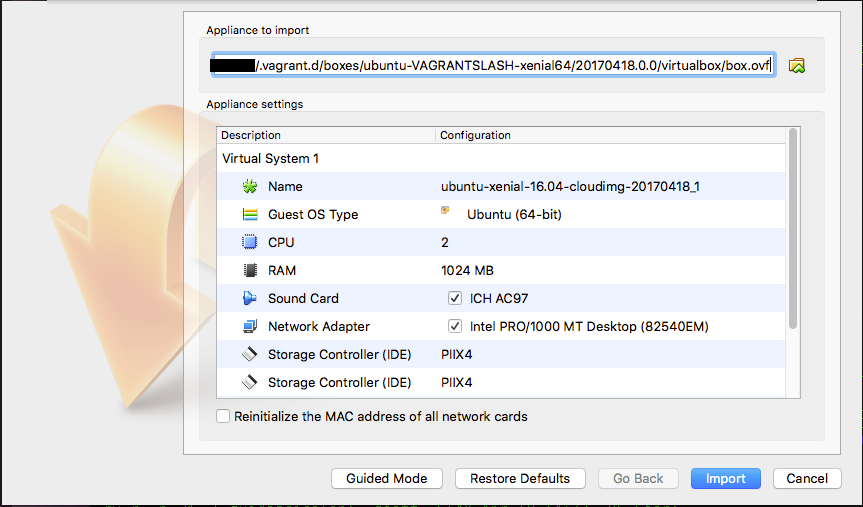
Import Virtual Box Appliance
Under the menu: File -> select “Import Appliance”
A dialog window will popup.
For Vagrant Users only
If you use Vagrant on Mac OSX then press MAIUSC + CMD + . to show hidden files in the file list. Go into your home folder.
Go into ~/.vagrant.d/boxes/ubuntu-VAGRANTSLASH-xenial64/20170418.0.0/virtualbox
For the others
Go to your boxes folder.
Folder may differ from ../20170418.0.0/..
Select box.ovf file inside your box folder

Press Import button to import the VM.
Resize Virtual Box Appliance Hard Disk
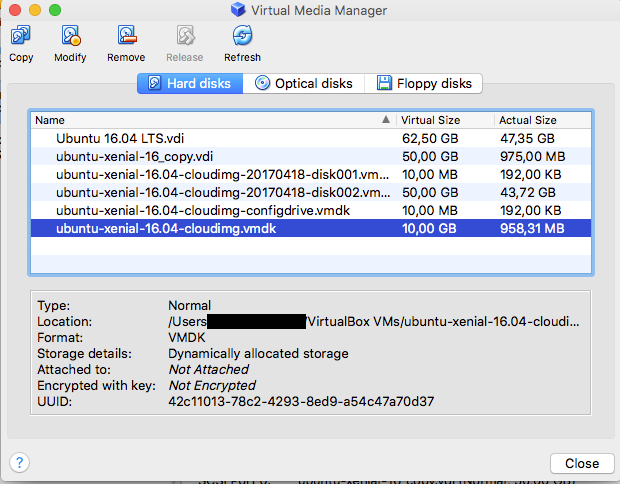
Under the menu: File -> select “Virtual Media Manager”
Select the row: ubuntu-xenial-16.04-cloudimg.vmdk. It should have a Virtual Size of 10 GB.

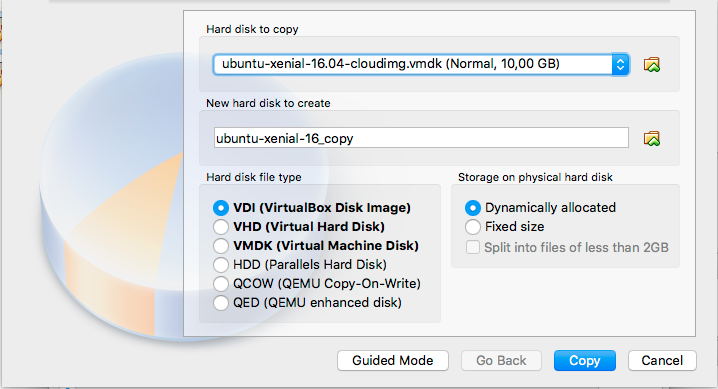
Right click and choose “Copy”. A popup will appear.
Under the section “New hard disk to create” check the name. Name it ubuntu-xenial-16_copy.
Be sure that the file location will match the previous box folder (~/.vagrant.d/boxes/ubuntu-VAGRANTSLASH-xenial64/20170418.0.0/virtualbox)
Select “VDI” in Hard disk file type section and “Dynamically allocated” in Storage on physical hard disk section.

Then press copy to clone that hard disk.
Resize VDI Hard Disk
Now go back in terminal and cd into the appliance folder:
cd ~/.vagrant.d/boxes/ubuntu-VAGRANTSLASH-xenial64/20170418.0.0/virtualbox
Fix path for ../20170418.0.0/..
VBoxManage modifyhd ubuntu-xenial-16_copy.vdi --resize 51200
This will resize the VDI image from 10GB to 50GB
cp box.ovf box.ovf.ori
Backup the original ovf file
Swap Hard Disks
Select the new VM
It should be named like “ubuntu-xenial-16.04-cloudimg…”
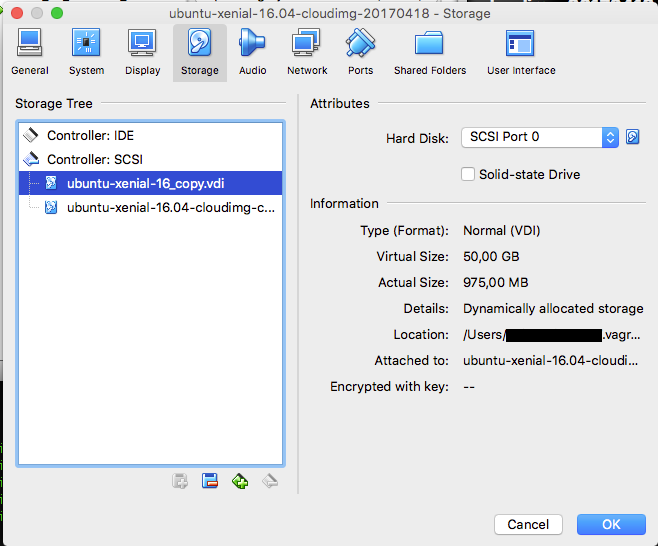
Press Settings then go under Storage section. You should have 2 disks under SCSI controller.
Select the first one (it should have a size of 10GB). Right click and choose Remove from attachment.
Now add a new one by selecting “Controller: SCSI” tree element and pressing the plus button with the tooltip “Add new storage attachment” -> then select “Add new Hard Disk”
A dialog will be displayed. Press “Choose existing disk” button.
Choose ~/.vagrant.d/boxes/ubuntu-VAGRANTSLASH-xenial64/20170418.0.0/virtualbox/ubuntu-exnial-16_copy.vdi file. and confirm.
It everything is fine the new hard disk added should show a Virtual Size of 50 GB.

Export the Fixed Appliance
Under the menu: File -> select “Export Appliance”
- Select “OVF 1.0” as format
- Check “Write Manifest file” checkbox
- Select ~/.vagrant.d/boxes/ubuntu-VAGRANTSLASH-xenial64/20170418.0.0/virtualbox/box.ovf as File
Press Export button to confirm.
Now you have more space to provision your awesome system ![]()
Leave A Comment